Search for how to bleed motorcycle brakes and you get a wall of videos: clear tube, jam jar, squeeze and hold, twenty minutes and a coffee. What almost none of them tell you is that on the page of your owner’s manual where this job lives, a bleed is not the job. It is one step inside something bigger, on a clock that has nothing to do with your odometer.
So I read the sources instead of the blog posts: two factory manuals, the official maintenance schedules of a second manufacturer, the booklet American licensing programmes are built on, and the federal regulation that decides what can legally be sold in a bottle marked DOT 4. They agree on the mechanism. They disagree on the scope of the service — and one of them measures something the others take on trust.
The one interval your manual counts in years
Open the periodic maintenance chart in a Yamaha MT-07 manual and look at the shape of the table before reading a single word. The columns are 1,000 km, 10,000 km, 20,000 km, 30,000 km, 40,000 km, plus a column for the annual check. Almost every row is a pattern of ticks across those columns.
Row 7 has no ticks at all. Across the whole width of the table it prints one instruction:
Brake fluid — Replace. — Every 2 years
The MT-09 manual, a different model and a later book, prints the same row with a different verb: Change. Every 2 years. Row 6, immediately above, behaves the same way — the hoses get inspected at every mileage column, then carry a line of their own:
Brake hoses — Replace. — Every 4 years
This is the same structural oddity I found on the drive chain, where the chain row escapes the mileage columns too — except it escapes in the opposite direction. The chain wants attention roughly twelve times between services. The fluid wants it once every two years, whether the bike covers 40,000 km in that time or sits under a cover in a garage.
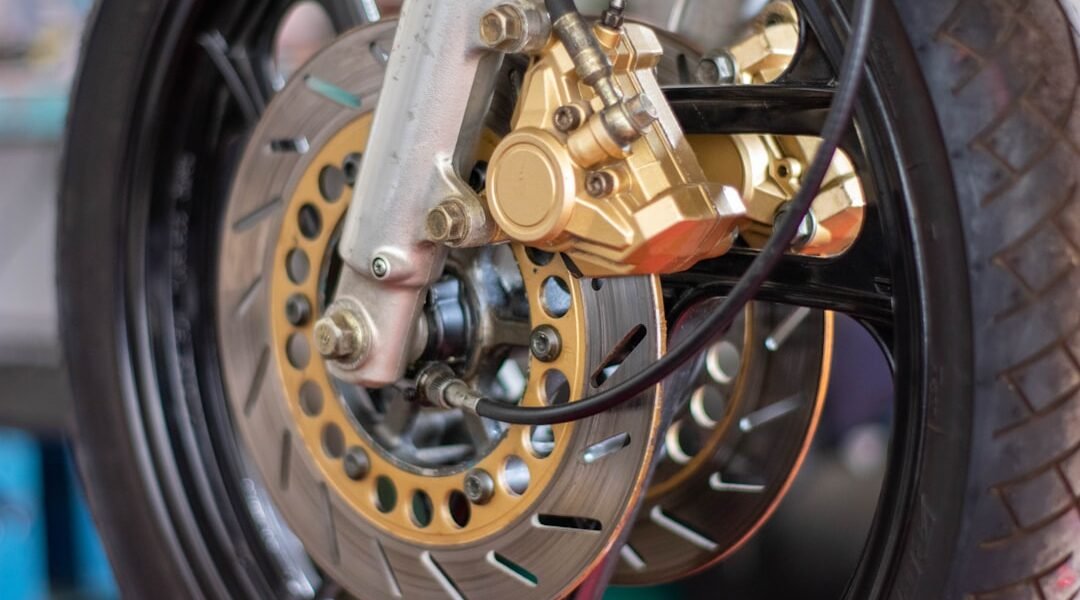
And the pads, the item most riders assume has a mileage, do not have one either. Rows 4 and 5 ask you to check operation, fluid level and vehicle for fluid leakage at every interval, and then say only this about replacement: whenever worn to the limit. The wider logic of how those columns are built, and why two manufacturers fill them in differently, is the subject of the maintenance schedule breakdown. Here the brakes are the whole story.
Why the clock runs on time and not distance
The reason is chemistry, and Honda’s own after-sales technical page states it in four sentences:
The force exerted by squeezing the brake lever is transferred to the brake caliper via brake fluid, clamping on the brake disc. […] Brake fluid gradually absorbs moisture from the air. As this moisture is absorbed, the boiling point of brake fluid decreases, which may cause the brake fluid to boil and vaporize. Vaporization creates the same conditions as when air is added to the brake fluid, resulting in poor braking. (This is called the vapor lock phenomenon)
Brembo puts the same property in one word — glycol-based fluids are hygroscopic, meaning they “actively absorb moisture from the environment” — and adds the size of the effect: with just a few percent water content, the boiling point can drop “by as much as 80°C”.
That absorption happens while the bike is parked. It does not care how many miles are on the clock, which is why the interval is printed in years. Yamaha’s own warning ties the two ends together:
Water will significantly lower the boiling point of the fluid and may result in vapor lock, and dirt may clog the ABS hydraulic unit valves.
Note the second half of that sentence, because it is the modern part. On a bike with ABS there is a hydraulic unit full of small valves between the lever and the caliper. It also matters for a reason that has nothing to do with maintenance: the front brake supplies at least 70 percent of the stopping power, so a rider guessing at that lever is guessing at most of the brake, and it is one of the things dirty fluid can reach.
The DOT numbers are not a ladder
This is where the internet is most confidently wrong, and the correction is not an opinion — it is in the federal regulation that governs what can be sold as brake fluid in the United States, FMVSS No. 116, codified at 49 CFR § 571.116.
Two tables in that standard set the minimum boiling points a fluid must reach to carry each grade. The first is the dry number, measured on fresh fluid:
| Grade | Minimum dry boiling point (ERBP) | Minimum wet boiling point |
|---|---|---|
| DOT 3 | 205 °C (401 °F) | 140 °C (284 °F) |
| DOT 4 | 230 °C (446 °F) | 155 °C (311 °F) |
| DOT 5 | 260 °C (500 °F) | 180 °C (356 °F) |
Those are legal minimums for the grade, not the performance of any particular bottle: a product is free to beat them. But look at what is missing from the table: DOT 5.1 has no row of its own. It appears elsewhere in the same standard, and where it appears is the point:
DOT 3, DOT 4, and DOT 5.1 non-SBBF—colorless to amber.
DOT 5 SBBF—purple.
Hydraulic system mineral oil—green.
SBBF is silicone base brake fluid, which the standard defines as “a brake fluid which consists of not less than 70 percent by weight of a diorgano polysiloxane”. So DOT 5 is a silicone fluid and the law makes it purple; DOT 5.1 is explicitly non-silicone and sits in the same colourless-to-amber family as DOT 3 and DOT 4. The labelling clause spells the two names out in full, in capitals, as separate options a packager must choose between: DOT 5 SILICONE BASE, or DOT 5.1 NON-SILICONE BASE.
The numbering suggests a ladder — 3, 4, 5, 5.1 — where each rung is better than the last. It is not a ladder. It is two chemistries sharing a numbering scheme, and the regulation quietly admits the problem in its compatibility clause: every fluid tested must show no stratification when mixed with the reference material, except DOT 5 SBBF, which is exempted from that requirement in both the low-temperature and the 60 °C test.
Your manual settles the question anyway, and settles it narrowly. Both Yamaha manuals print the same specification — Specified brake fluid: DOT 4 — and back it with two warnings that leave no room for improvisation:
Use only the specified brake fluid; otherwise, the rubber seals may deteriorate, causing leakage. […] Refill with the same type of brake fluid. Adding a brake fluid other than DOT 4 may result in a harmful chemical reaction.
The green fluid in the third line of that colour list is worth noticing too. Hydraulic system mineral oil is a different product with its own labelling rules in the same standard, and one of the warnings it is required to carry says exactly why the colour matters: it “is NOT COMPATIBLE with the rubber components of brake systems designed for use with DOT brake fluids”. Green is not a brand choice. It is a keep-away sign.
What “wet” means, and the number one manufacturer acts on
The wet boiling point is not a marketing category. It is the result of a laboratory procedure written into the standard: a sample is humidified in a desiccator at 50 °C alongside a reference fluid, and the humidification stops when the water content of that reference fluid reaches 3.70 ±0.05 percent by weight. Then the sample’s water content and boiling point are measured.
In other words, the wet number on a bottle is not a worst case invented by a lawyer. It describes fluid that has taken on water in the region of three and a half percent — the direction every glycol-based fluid travels in, from the day it goes into the system, whether the bike is ridden or parked.
Now put a manufacturer’s schedule next to it. Harley-Davidson’s official 2018 maintenance schedules print this line on every model table:
Flush brake system and replace DOT 4 hydraulic brake fluid every two years or sooner if moisture content is 3% or greater
Three percent. The trigger for an early flush sits just below the water content at which the fluid is only guaranteed to deliver its wet rating. And Harley does not wait two years to find out where the fluid is: a separate line, marked as an annual item, reads Check DOT 4 front brake fluid for moisture — and the same again for the rear.
That is the quiet difference between the two manufacturers I read. One sets a calendar and trusts it. The other sets the same calendar and then measures the fluid every year to see whether the calendar is lying.
The two-year job is not a bleed
Here is the finding that made this article worth writing, and it takes two quotes.
The MT-09 manual has a boxed tip headed Hydraulic brake service:
Regularly check and, if necessary, correct the brake fluid level. Every two years replace the internal components of the brake master cylinders and calipers, and change the brake fluid. Replace the brake hoses every four years and if cracked or damaged.
And the body of the same chapter is more specific still:
Have a Yamaha dealer change the brake fluid every 2 years. In addition, have the seals of the master cylinders and brake calipers, as well as the brake hoses replaced at the intervals listed below or sooner if they are damaged or leaking. — Brake seals: every 2 years — Brake hoses: every 4 years
The older MT-07 manual says the same thing in slightly older language: oil seals: replace every two years; brake hoses: replace every four years.
Read that against the search results for this job. The videos, the forum threads and the how-to posts describe pushing new fluid through the system and getting the air out. The manual describes rebuilding the master cylinders and calipers with new seals, changing the fluid as part of that, and giving every brake hose on the bike a four-year expiry date. A shop that quotes you a bleed-and-refill is quoting something considerably smaller than what the manual asks for.
Two manufacturers, two different two-year jobs
The interval agrees. The scope does not.
| Yamaha (MT-07, MT-09 manuals) | Harley-Davidson (2018 schedules) | |
|---|---|---|
| Fluid | Change every 2 years | Flush and replace every 2 years, or sooner if moisture content is 3% or greater |
| Moisture test | Not mentioned | Check DOT 4 front / rear brake fluid for moisture — annually |
| Master cylinder and caliper seals | Replace every 2 years | No such line in the document |
| Brake hoses | Inspect at each service, replace every 4 years | No such line in the document |
| Pads and discs | Replace pads whenever worn to the limit | Inspect brake pads and discs for wear at every service column |
| Fasteners | Not itemised for the brakes | Check brake banjo bolt torque at intervals |
| Fluid specified | DOT 4 | DOT 4 |
Two of those cells deserve care rather than a headline. In the Harley document I read — the official 2018 maintenance schedules, every model table and every footnote — the words hose and seal do not appear once. That is a fact about that document, not a claim that Harley believes rubber lasts forever; a full service manual is a different publication. But it does mean that a rider following each manufacturer’s own published schedule to the letter would end up doing two visibly different jobs at the same two-year mark, and only one of them would be replacing hoses on a timetable.
The mirror image also holds: Harley itemises a brake banjo bolt torque check that Yamaha’s chart does not list at all, and it asks for a moisture measurement that Yamaha never mentions.
How to bleed motorcycle brakes, and who the manuals say should do it
Now the procedure — with an honesty clause first, because it is part of the answer.
Both Yamaha manuals hand this job to someone else. Not “you may wish to consult a professional” — the sentence is “Have a Yamaha dealer change the brake fluid”, printed as the instruction itself. Harley marks its brake system row with a footnote that is more generous and more precise:
Should be performed by an authorized Harley-Davidson dealer, unless you have the proper tools, service data and are mechanically qualified.
That is the honest frame for everything below. Bleeding brakes is not exotic, and plenty of riders do it well; it is also a job whose mistakes announce themselves at the worst possible moment, which is why the people who build motorcycles write the sentence that way. The redundancy a rider has is the second circuit — which is exactly why the licensing checklist further down tests each brake on its own. If you are doing it yourself, the outline looks like this — and every specific number, from the fluid grade to the bleed sequence to the fastener torques, has to come from the service data for your own bike, not from a page like this one:
- Start with the right fluid, from a sealed container. Yamaha’s instruction is unambiguous: “Clean the filler cap before removing. Use only DOT 4 brake fluid from a sealed container.” A part-used bottle that has been open in a garage has been absorbing moisture the whole time.
- Protect everything the fluid can touch. The manual’s own notice: “Brake fluid may damage painted surfaces or plastic parts. Always clean up spilled fluid immediately.” This is a job where the wet rag comes out before the spanners.
- Level the reservoir before opening it. The master cylinder has to be level for the fluid to sit where the marks assume it sits — which on most bikes means the handlebars straight for the front, the bike upright for the rear.
- Work one caliper at a time and never let the reservoir run dry. The warning is spelled out in both manuals: “Insufficient brake fluid may allow air to enter the brake system, reducing braking performance.” Emptying the reservoir mid-bleed pulls air into the master cylinder, which turns a fluid change into a much longer afternoon.
- Keep dirt out of the system. Beyond the obvious, there is the ABS clause: dirt “may clog the ABS hydraulic unit valves”. On an ABS bike this stops being a cosmetic concern.
- Finish on the seals and hoses. This is the step the videos skip. If the calendar says two years, the manual’s version of that service includes the master cylinder and caliper internals; at four years it includes the hoses. Inspect them the way the licensing manual describes — for “cuts, cracks, leaks, bulges, chafing, deterioration” — and check they are routed with no pulling at the steering head through full lock.
- Test before you ride, not on the road. The pre-ride standard is one line: each brake, on its own, must hold the bike still.
If the lever still feels wrong after all that, the manuals do not invite you to diagnose it by feel. Yamaha’s instruction for a sudden drop in fluid level is to “have a Yamaha dealer check the cause before further riding” — a leak, worn pads and air in the system all present at the reservoir, and they are not the same problem.
The reservoir is a pad-wear gauge, and topping it up breaks the gauge
This is the most useful thing in the whole chapter, and it is one sentence in each manual.
Yamaha:
As the brake pads wear, it is normal for the brake fluid level to gradually go down. A low brake fluid level may indicate worn brake pads and/or brake system leakage; therefore, be sure to check the brake pads for wear and the brake system for leakage.
Harley, in a footnote to its own tables:
Brake fluid level will drop as brake pads wear.
The physics is simple: as the friction material thins, the pistons sit further out of the caliper, and the fluid that fills the space behind them comes out of the reservoir. A slowly falling level on a healthy system is not a fault. It is a measurement of your pads, taken for free, every time you glance at the sight glass.
Which is why habitually topping the reservoir back up to the line is a bad habit rather than a good one. It does not fix anything — the fluid has not gone anywhere, it is out in the calipers doing its job — and it deletes the only wear signal you get without taking a wheel off. Worse, when the pads are finally replaced and the pistons are pushed back in, an over-filled reservoir has nowhere to put the returning fluid.
The same footnote page from Harley contains the perfect control experiment. Note 5 is the brake line above. Note 6 says the opposite about a different system:
Clutch fluid level will rise as clutch wears.
Same kind of reservoir, same kind of fluid, opposite direction — which tells you the level is telling you something, not drifting at random.
For the pads themselves, both Yamaha manuals describe a check that needs no tools:
Each rear brake pad is provided with wear indicator grooves, which allow you to check the brake pad wear without having to disassemble the brake. To check the brake pad wear, check the wear indicator grooves. If a brake pad has worn to the point that a wear indicator groove almost appears, have a Yamaha dealer replace the brake pads as a set.
Two details there are easy to miss. That passage is the rear brake; for the front, the same manuals ask you to check the position of the wear indicators while applying the brake, because that is when the indicator lines up against the disc. And pads go in as a set — the same logic that governs chains and sprockets, for the same reason.
The ten-second check before you ride
There is a small, genuine disagreement between the factory and the licensing system here, and it runs the opposite way from the one I found on the chain.
Yamaha is the stricter of the two:
Before riding, check that the brake fluid is above the minimum level mark.
The Motorcycle Safety Foundation’s Motorcycle Operator Manual — the booklet American licensing programmes are built on — introduces its T-CLOCS inspection as something that “should be conducted before every ride”, and then, in the O for Oil section, softens this specific item:
Check the brake hydraulic fluid and coolant level, if equipped, weekly.
Both are defensible and the resolution is obvious: look at the sight glass every time, because it costs nothing, and treat the weekly line as the floor rather than the target. What T-CLOCS does add is the functional test that the factory chart leaves implicit, and it is beautifully blunt:
Brakes — Function — Each brake alone keeps bike from rolling.
Front and rear, separately, each one holding the bike. Alongside it the checklist asks for a look at the hoses — “cuts, cracks, leaks, bulges, chafing, deterioration” — and for hydraulic leaks specifically at “hoses, master cylinders, calipers”. That is a thirty-second sweep with a torch, and it belongs in the same routine as the rest of the pre-ride checklist and in the basic-mechanics repertoire every rider ends up building.
It matters more than it sounds in the two conditions where braking distance stops being theoretical: in the rain, and on the first ride after months in a garage, which is exactly when the post-storage checklist earns its place.
What the bottle is legally required to tell you
The last thing worth reading is not on your bike, it is on the container — and four of the sentences printed there are not the manufacturer’s marketing copy. They are text the regulation requires, word for word:
FOLLOW VEHICLE MANUFACTURER’S RECOMMENDATIONS WHEN ADDING BRAKE FLUID.
>
KEEP BRAKE FLUID CLEAN AND DRY. Contamination with dirt, water, petroleum products or other materials may result in brake failure or costly repairs.
>
STORE BRAKE FLUID ONLY IN ITS ORIGINAL CONTAINER. KEEP CONTAINER CLEAN AND TIGHTLY CLOSED TO PREVENT ABSORPTION OF MOISTURE.
>
CAUTION: DO NOT REFILL CONTAINER, AND DO NOT USE FOR OTHER LIQUIDS.
The third of those is the one riders break without thinking. A fluid that pulls water out of the air even while sealed inside a brake system is not going to hold out in a part-used bottle with a loose cap on a garage shelf. That is why the manual asks for a sealed container, and why the regulation also requires the container to carry a tamper-proof closure that is destroyed or substantially altered the first time it is opened.
One more labelling clause is worth knowing, because it reverses a common assumption. Among the things the packager must print is “the minimum wet boiling point in Fahrenheit of the DOT brake fluid in the container”. The number the law insists on is the wet one — the figure that describes the fluid once it has taken on water, not the figure it posts on its first day.
A brake routine that survives contact with reality
Strip out the contradictions and what is left is short.
- Look at the sight glass every ride. Above the minimum mark. Ten seconds, and it doubles as a pad-wear reading.
- Do not top it up as a reflex. A slow drop is the pads talking. A sudden drop is a question for a workshop.
- Check the pads through the indicator grooves, front ones while squeezing the lever, and replace them as a set.
- Put the fluid on the calendar, not the odometer. Two years is the number both manufacturers print; one of them measures moisture annually and flushes early at 3%.
- Get your bike’s own specification once and write it down — fluid grade, hose age, whether your model’s schedule includes the seals. It is in your manual and it is not in anyone’s blog post, including this one.
- Buy small, sealed, and use it once. The label’s own instruction.
- Treat the four-year hose line as real. It is printed in the same table as everything else you do respect.
- Inspect hoses and unions with a torch for cuts, cracks, bulges and chafing, and check nothing pulls at full lock.
Do that and the brakes stop being the system you only think about when something already feels wrong — which is the entire point, because by then the information arrives through the lever at the least convenient moment available. It also removes one of the two consumables that ruin long trips, the other being tyres, and it sits naturally in a year-round maintenance calendar rather than in a panic the week before a holiday. One practical footnote: since spilled fluid attacks paint and plastic, the sensible time to inspect the whole system closely is right after washing the bike, when everything is clean enough to see a weep.
Where a riding log actually helps
Almost everything on this page is a date. Fluid at two years, hoses at four, a moisture check once a year, seals on the same two-year mark. Dates are exactly the thing a rider forgets, because nothing on the bike counts them.
That is the practical reason I built RideLog: it records rides automatically — it starts on movement, with no start/stop button to press — and it carries maintenance reminders for the recurring jobs on a bike, so the service, the tyres, the insurance and the paperwork stop depending on memory. If you run more than one motorcycle, each is tracked separately, which matters here: the bike that has covered 2,000 km since its last service and the one that has been parked since April are on the same two-year fluid clock, and only one of them feels like it needs anything.
Unusually for the maintenance articles on this blog, the app’s unit is the right one this time. When I wrote about chain maintenance I had to flag that reminders think in dates while a chain thinks in kilometres and rain. Brake fluid thinks in dates. Set it once, two years out, and the reminder is the whole job.
Three limits I would rather state than have you discover:
- RideLog does not know your bike’s brake specification. No factory schedules are loaded, and after reading two manuals from one manufacturer and the tables of another that disagree about whether hoses and seals are even on the list, a generic number would be worse than none. Fluid grade, hose interval and torque figures come from your manual.
- A reminder is not an inspection. Nothing in the app can see a weeping caliper or a sight glass below the line. The ten-second look before riding is still yours.
- The distance is the phone’s GPS distance, not a reading from your odometer. Accurate enough to tell you how much riding a set of pads has had; not a legal odometer reading.
It works fully offline and nothing leaves the device — no account, no server holding your rides. If you want to see how it compares with the other apps in this space, that comparison lives in the roundup of motorcycle apps, and it is free to try: download RideLog.
Frequently asked questions
How often should motorcycle brake fluid be changed?
Every two years, and the sources are unusually consistent about it. Yamaha’s periodic maintenance chart prints “brake fluid — replace — every 2 years” with no mileage figure at all, and Harley-Davidson’s 2018 schedules say to “flush brake system and replace DOT 4 hydraulic brake fluid every two years or sooner if moisture content is 3% or greater”. Brembo’s own recommendation for road use is every one to two years. Nobody gives an interval in miles or kilometres, because the fluid degrades by absorbing moisture from the air whether the bike moves or not.
Can I bleed my motorcycle brakes myself?
The manuals would rather you did not, and they say so plainly. Both Yamaha manuals instruct the owner to “have a Yamaha dealer change the brake fluid”; Harley’s schedules mark the brake system row as work that “should be performed by an authorized Harley-Davidson dealer, unless you have the proper tools, service data and are mechanically qualified”. That second phrasing is the fair one. The job is not exotic, but the tools, the service data and the honesty about your own limits are all part of it — and the full two-year service in the manual involves considerably more than a bleed.
What is the difference between DOT 4 and DOT 5 brake fluid?
They are different chemistries, not different grades of the same thing. Under the federal standard that governs brake fluid, DOT 5 is a silicone base fluid — defined as “not less than 70 percent by weight of a diorgano polysiloxane” — and must be coloured purple, while DOT 3, DOT 4 and DOT 5.1 non-silicone fluids must be colourless to amber. The standard even requires the label to spell out “DOT 5 SILICONE BASE” or “DOT 5.1 NON-SILICONE BASE” in full. The number sequence looks like a ladder and is not one. Use whatever your manual specifies: both Yamaha models here specify DOT 4 and warn that adding anything else “may result in a harmful chemical reaction”.
Why does my brake fluid level keep dropping?
Most likely because your pads are wearing, which is normal and expected. Yamaha states it directly: “as the brake pads wear, it is normal for the brake fluid level to gradually go down”, and Harley repeats it in a footnote — “brake fluid level will drop as brake pads wear”. As the friction material thins, the caliper pistons sit further out and hold more fluid. The two things that are not normal are a leak and a sudden drop; for the latter, the manual’s instruction is to have a dealer find the cause before riding again.
What does the wet boiling point on the bottle mean?
It is the boiling point of the fluid after it has absorbed water, measured by a defined laboratory procedure: the sample is humidified in a desiccator at 50 °C alongside a reference fluid, and the test stops when that reference reaches 3.70 ±0.05 percent water by weight. The federal standard sets the minimum wet figure at 140 °C for DOT 3 and 155 °C for DOT 4, against dry minimums of 205 °C and 230 °C. It also requires the packager to print the minimum wet boiling point on the container — so the number the law insists on is the pessimistic one.
Do brake hoses really need replacing every four years?
One manufacturer says so in writing. Both Yamaha manuals list brake hoses for inspection at each service interval and for replacement “every four years”, alongside master cylinder and caliper seals every two years. Harley-Davidson’s 2018 maintenance schedules are a different document with a different scope: across all its model tables the words “hose” and “seal” do not appear at all. So this is one of the places where following your own manufacturer’s published schedule matters more than following general advice — and where a rubber part carries an expiry date that nothing on the bike will ever remind you of.
How do I know when motorcycle brake pads need replacing?
Look at the wear indicator grooves, which both Yamaha manuals describe as a way “to check the brake pad wear without having to disassemble the brake”. The manual’s own trigger is a pad “worn to the point that a wear indicator groove almost appears” — at which point the pads are done, and they are replaced as a set rather than individually. Front pads are checked while the brake is applied, because that is when the indicator lines up. Harley’s schedules also put “inspect brake pads and discs for wear” at every service column, so the disc gets looked at in the same pass. Neither manufacturer gives a mileage: it is condition, not distance.