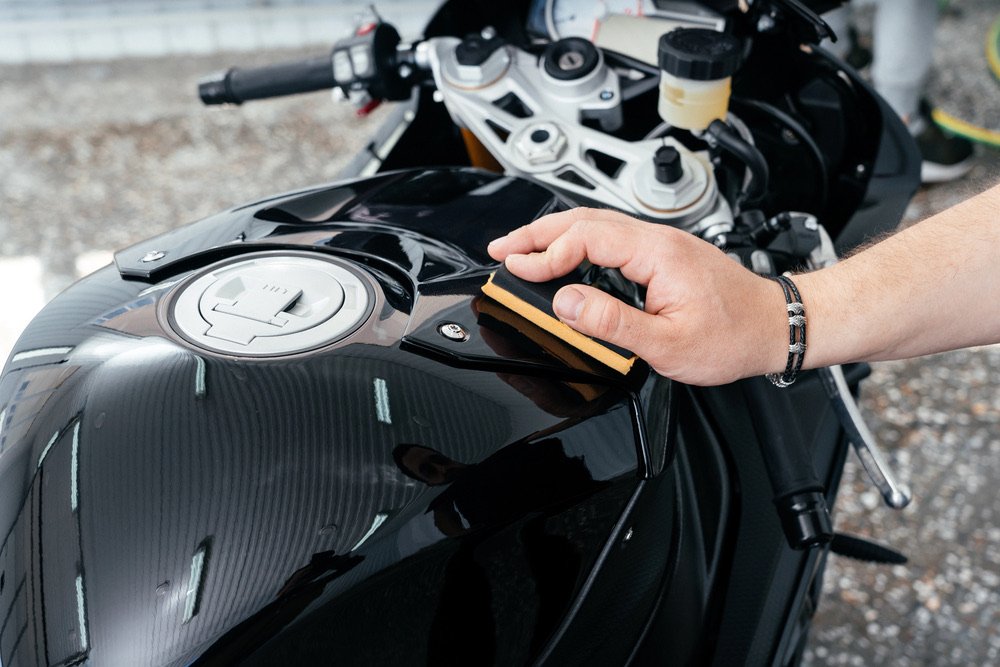
There’s a special bond between a motorcyclist and their bike—it’s a relationship built on trust, passion, and yes, a good dose of maintenance. Whether you’re a seasoned rider or just starting your two-wheeled adventure, knowing how to perform basic motorcycle mechanics operations is essential. Not only does it save you money at the workshop, but it also gives you confidence, independence, and a deeper understanding of your machine. In this guide, we’ll walk you through 10 fundamental operations that every motorcycle owner should master, from checking tire pressure to verifying command play. Each operation is designed to be accessible, practical, and perfectly suited for riders of all experience levels.
The beauty of learning basic motorcycle mechanics is that you don’t need an expensive workshop or years of experience—just the right tools, a bit of patience, and the willingness to get your hands dirty. By the end of this article, you’ll have a complete roadmap to keep your bike in top condition, ensuring safety, performance, and longevity. Plus, we’ll show you how RideLog can help you stay on top of your maintenance schedule with timely reminders and organized records.
1. Checking and Adjusting Tire Pressure
Your tires are quite literally where the rubber meets the road, making tire pressure one of the most critical maintenance tasks. Incorrect pressure affects handling, fuel consumption, safety, and tire longevity. This is the first operation every motorcyclist should perform regularly.
Difficulty Level: ⭐ Easy
This is one of the most straightforward tasks you can perform on your motorcycle. Even complete beginners can master it in minutes.
Tools Needed:
- Tire pressure gauge (analog or digital)
- Air pump (manual, electric, or at a gas station)
- Your motorcycle’s manual to find recommended PSI
How to Do It:
First, ensure your motorcycle is on level ground and the tires are cold (checked before riding or at least 3 hours after riding for accurate readings). Locate the tire valve stem, remove the cap, and press your tire pressure gauge firmly onto the valve for a reading. Compare this to the manufacturer’s recommended pressure, which you’ll find in your owner’s manual or on a sticker inside the fuel door. If the pressure is low, use your air pump to inflate. If it’s too high, press the small pin inside the valve to release air. Check both front and rear tires—they may require different pressures.
Recommended Frequency:
Every 2 weeks or before long rides. Tire pressure naturally decreases over time and with temperature changes.
—2. Checking Oil Level
Engine oil is the lifeblood of your motorcycle. It lubricates engine components, reduces friction, and helps dissipate heat. Regular oil level checks are fundamental to motorcycle maintenance.
Difficulty Level: ⭐ Easy
One of the easiest maintenance operations you can perform without specialized knowledge.
Tools Needed:
- Clean cloth or paper towel
- Your motorcycle’s manual
- Fresh engine oil (matching your bike’s specifications)
How to Do It:
Park your motorcycle on level ground. Locate the oil sight glass or dipstick—consult your manual if you’re unsure. For sight glass models, the oil level should be between the minimum and maximum lines. For dipstick models, remove the stick, wipe it clean, reinsert it fully, then remove it again to check the level. The oil should reach the “full” mark. If it’s low, add small amounts of the recommended oil type until it reaches the proper level. Avoid overfilling, as this can cause engine problems.
Recommended Frequency:
Every month or before long trips. Some motorcycles burn oil faster than others, so regular checks are essential.
—3. Checking Brake Fluid Level
Your brakes are literally a matter of life and death on a motorcycle. Brake fluid is hygroscopic, meaning it absorbs moisture over time, which can compromise braking performance. Checking your brake fluid level and condition is non-negotiable.
Difficulty Level: ⭐ Easy
Simple visual inspection, though brake service requires more expertise.
Tools Needed:
- Clean cloth
- DOT 3, DOT 4, or DOT 5.1 brake fluid (check your manual for the correct type)
- Small funnel (optional but helpful)
How to Do It:
With the motorcycle upright on level ground, locate your brake fluid reservoirs—there’s typically one for the front brakes (near the handlebars) and one for the rear brakes (near the seat or frame). Look through the translucent plastic reservoir to check the level. It should be between the minimum and maximum lines. If low, carefully add the correct type of brake fluid—never mix types. Use a clean funnel to avoid spills and contamination. Be careful not to spill fluid on your bike’s paint, as it’s corrosive.
Recommended Frequency:
Every month. More frequent checks are needed if you’ve noticed softer brake feel or have been riding in wet conditions.
—4. Cleaning and Lubricating the Chain
Your motorcycle’s chain is a hardworking component that transfers power from the engine to the rear wheel. A dirty or dry chain wears quickly and can damage your sprockets. Regular cleaning and lubrication will extend the life of your drivetrain significantly.
Difficulty Level: ⭐⭐ Moderate
Requires a bit more effort and attention to detail than the previous tasks, but it’s definitely achievable for all riders.
Tools Needed:
- Chain cleaner or degreaser (motorcycle-specific preferred)
- Soft brush or old toothbrush
- Chain lubricant (O-ring chain lube recommended)
- Clean cloth or rag
- Center stand or motorcycle lift
How to Do It:
Park your bike on the center stand and rotate the rear wheel to expose different sections of the chain. Spray chain cleaner on the chain while rotating the wheel slowly by hand (don’t start the engine). Use your brush to scrub away grime, dirt, and old lubricant. Wipe the chain thoroughly with a clean cloth. Once dry, apply chain lubricant to the inside of the chain while slowly rotating the wheel. The lube should penetrate the chain’s rollers and side plates. Wipe away any excess to prevent dirt accumulation.
Recommended Frequency:
Every 500-1000 kilometers, or more frequently if riding in muddy or wet conditions. After washing your motorcycle, always re-lubricate the chain.
—5. Checking Brake Pad Wear
Worn brake pads are a safety hazard that directly affects your stopping power. Regular inspection ensures your brakes remain responsive and reliable, protecting both you and others on the road.
Difficulty Level: ⭐⭐ Moderate
Requires some mechanical understanding but is well within reach for most riders.
Tools Needed:
- Flashlight (helpful for seeing inside the brake caliper)
- Your motorcycle’s manual (for specification details)
- New brake pads (if needed)
How to Do It:
Look through the brake caliper’s opening to inspect the pads. Most pads have a wear indicator line or groove. If the pad material is nearly level with the indicator, replacement is needed. Generally, pads should be replaced when they’re worn to about 2-3mm thickness. Check both front and rear brakes independently, as they wear at different rates depending on your riding style. If uncertain, consult your manual for exact specifications. Note that some motorcycles have brake pad sensors that illuminate a warning light—pay attention to these.
Recommended Frequency:
Every month during regular checks, or every 1000-2000 kilometers depending on riding style. Aggressive riders may need more frequent inspections.
—6. Replacing Bulbs
Functioning lights are essential for visibility and communication with other road users. Burned-out bulbs are not only a safety hazard but often illegal. Replacing them is a quick, easy task that makes a real difference.
Difficulty Level: ⭐ Easy
One of the simplest mechanical operations, though some bikes have more accessible headlight units than others.
Tools Needed:
- Replacement bulbs (check your manual for correct types)
- Small screwdriver (possibly)
- Clean cloth or gloves (to avoid transferring oils to halogen bulbs)
How to Do It:
Different motorcycles have different light designs. For tail lights or indicator bulbs, you usually access them from inside the fairings or plastic covers—consult your manual for exact locations. Twist or remove the old bulb and replace it with a new one of the same type. For headlights, you may need to remove the headlight unit or access it from the side, depending on your bike’s design. Never touch halogen bulbs with your bare fingers; use a clean cloth instead. Test your lights immediately after replacement to ensure proper function.
Recommended Frequency:
As needed when bulbs burn out. Some riders prefer preventive replacement of older bulbs to avoid unexpected failures.
—7. Checking Battery Condition
Your battery powers your motorcycle’s electrical systems. A weak or failing battery can leave you stranded. Regular checks help catch problems before they become serious.
Difficulty Level: ⭐ Easy
Simple inspection, though advanced battery testing requires specialized equipment.
Tools Needed:
- Multimeter (optional, for voltage testing)
- Clean cloth
- Baking soda and water (for terminal cleaning if needed)
How to Do It:
Visually inspect your battery for corrosion on the terminals—white, blue, or green crusty deposits indicate corrosion. If present, disconnect the negative terminal first, then the positive. Mix baking soda and water to create a paste, apply it to corroded terminals, scrub with a brush, and rinse with clean water. Dry thoroughly and reconnect, positive first, then negative. If you have a multimeter, check the voltage with the engine off—it should be around 12-13 volts for a healthy battery. With the engine running, it should be 13.5-14.5 volts, indicating proper charging.
Recommended Frequency:
Every month, or every 2-3 months for reliable batteries. Check more frequently in cold weather, as batteries lose efficiency in low temperatures.
—8. Adjusting Mirrors
Properly adjusted mirrors are crucial for safe motorcycle riding. Poor mirror positioning creates blind spots and reduces your ability to see traffic around you. This simple adjustment can be a safety lifesaver.
Difficulty Level: ⭐ Easy
One of the quickest and easiest adjustments you can make on your motorcycle.
Tools Needed:
- Your hands only (mirrors are designed for manual adjustment)
- Possibly an Allen wrench, depending on your bike’s design
How to Do It:
Sit on your motorcycle in your normal riding position. Adjust each mirror so that you can see the road behind you and a small portion of your bike’s rear. Ideally, you should see mostly road with just a glimpse of your motorcycle’s side. This positioning maximizes your field of vision while minimizing blind spots. Most modern mirrors can be adjusted by hand; older or sportier bikes might require an Allen wrench. Make small adjustments and take a test ride to ensure the position feels right.
Recommended Frequency:
After any ride where a mirror was hit or feels misaligned, or monthly as part of your regular check-up.
—9. Verifying Command Play (Throttle, Clutch, Brake Lever)
Your throttle, clutch, and brake levers are the primary tools for controlling your motorcycle. Excessive play or stiffness in these controls can affect handling and responsiveness. Regular checks ensure optimal performance and safety.
Difficulty Level: ⭐⭐ Moderate
Requires basic mechanical knowledge, but adjustments are typically straightforward.
Tools Needed:
- Screwdrivers (Phillips and flat-head)
- Your motorcycle’s manual
- Light oil or lubricate (for smooth operation)
How to Do It:
With the engine off, gently rotate the throttle from fully closed to fully open. There should be a slight amount of smooth play—typically 2-3mm. If it’s too loose or too tight, locate the throttle cables (usually under the fuel tank or fairing) and adjust the cable adjusters at either end of the cable. The same principle applies to brake levers: they should have minimal play, usually adjusted via a barrel adjuster on the brake lever assembly. For clutch levers, follow your manual’s specific adjustment procedure. Always consult your manual for exact specifications and adjustment methods, as these vary between models.
Recommended Frequency:
Every month or after you notice unusual play or resistance. More frequent checks are needed for motorcycles used frequently or in challenging conditions.
—10. Checking Tire Condition
While tire pressure is important, the overall condition of your tires is equally critical. Proper tread depth, sidewall integrity, and absence of punctures or damage are essential for safe riding. This inspection complements your pressure checks.
Difficulty Level: ⭐ Easy
A visual and tactile inspection that requires no specialized tools or knowledge.
Tools Needed:
- Penny or tread depth gauge (optional)
- Flashlight (for detailed inspection)
- Your motorcycle’s manual (for tread depth specifications)
How to Do It:
Visually examine both tires for cuts, punctures, bulges, or uneven wear patterns. Use your flashlight to inspect the sidewalls thoroughly. Check the tread depth using the penny test: insert a penny (with Lincoln’s head facing down) into the grooves. If you can see the top of his head, the tread is too shallow and replacement is needed. Most regulations require a minimum of 2/32 inch of tread depth. Look for any signs of cupping (scalloped edges), which indicates suspension problems, or flat spots in the center, which suggest overinflation. Uneven wear on the sides might indicate underinflation or suspension issues.
Recommended Frequency:
Every month, or every 500-1000 kilometers. More frequent checks are needed as your tires approach the end of their service life.
—Stay Organized with RideLog
Keeping track of all these maintenance tasks can feel overwhelming, especially for riders who use their motorcycles frequently. This is where RideLog comes in handy. RideLog is a comprehensive motorcycle management app that helps you stay on top of your maintenance schedule with timely reminders, detailed service records, and organized documentation.
With RideLog, you can set reminders for each maintenance task based on time intervals or mileage. The app tracks all your service history, helping you remember when you last checked your tire pressure, changed your oil, or lubricated your chain. Beyond maintenance, RideLog also tracks your rides, monitors fuel consumption, manages expenses, and provides statistics on your riding habits. Whether you’re a casual weekend rider or a dedicated motorcyclist who logs thousands of kilometers annually, RideLog keeps everything organized in one place.
—Conclusion: Mastering the Basics
Learning these 10 basic motorcycle mechanics operations transforms you from a passive motorcycle owner into an engaged, confident rider. From checking tire pressure and oil levels to verifying command play and inspecting tires, these tasks form the foundation of responsible motorcycle ownership. Each operation is designed to be accessible—even for beginners—while providing significant value in terms of safety, performance, and longevity of your machine.
Remember, motorcycle maintenance isn’t about becoming a professional mechanic. It’s about developing a relationship with your bike, understanding how it works, and taking responsibility for its care. Most of these tasks take just minutes and require minimal tools. The investment in time and attention now prevents expensive repairs and dangerous situations down the road.
Start with the easiest tasks, build your confidence, and gradually tackle the more moderate-difficulty operations. Don’t hesitate to consult your owner’s manual—it’s your most valuable resource. And when you’re ready to take control of your maintenance schedule with organization and reminders, download RideLog to keep track of every service, every ride, and every kilometer. Your motorcycle—and your riding experience—will thank you for it.