The lever starts telling you something long before anything breaks. It comes back too far before the bike moves, or it bites the moment it leaves the grip, or first gear crunches at a standstill and neutral has gone into hiding. So you look up motorcycle clutch adjustment, and the first page of results shows you the same two screws over and over, in a different accent each time.
Before those two screws there is a question the entire first page skips: which clutch is bolted to your bike. Because on a large slice of motorcycles sold today the answer to “how do I adjust it” is that you do not — there is nothing to adjust, and the maintenance it wants instead is on a completely different clock.
I went to the primary sources for this one rather than to the forums: two Yamaha owner’s manuals ten years apart, Harley-Davidson’s official 2018 maintenance schedules covering nine model families in one document, the Motorcycle Safety Foundation manual that American states build their licensing programmes on, Suzuki’s technical sheet on the JASO oil standard, and the printed instructions of a company that manufactures clutches. They disagree about the number. They agree about something more interesting.
Start here: does your bike even have a clutch adjustment?
Harley-Davidson publishes one document, 2018 Maintenance Schedules, that covers nine model families side by side. Reading the clutch rows across all nine tables is the fastest way to see the split, and it is not a subtle one.
| Model family | “Check clutch adjustment” | DOT 4 clutch fluid |
|---|---|---|
| Sportster | yes | — |
| Softail | yes | — |
| Touring | — | yes |
| Police | — | yes |
| Trike | — | yes |
| FLHTKSE, FLHXSE, FLTRXSE (three CVO tables) | — | yes |
| Street | — | — |
Two families out of nine get a line that reads Check clutch adjustment, ticked at the first 1,000-mile service and then every 5,000 miles, alongside “Check, adjust and lubricate brake and clutch controls”. The Street models are the odd one out: their table carries neither line, only a generic “Check and adjust brake and clutch controls” at every service.
Six families get something else entirely. Their tables carry Inspect clutch fluid system for leaks, contact or abrasion and Check DOT4 clutch fluid and front brake fluid for moisture, plus a line that runs across the whole width of the table, outside the mileage columns:
Flush brake and clutch systems and replace DOT 4 hydraulic brake and clutch fluids every two years or sooner if moisture content is 3% or greater
That is the same two-year clock, the same fluid and the same moisture threshold that governs the brakes — a job I went through in detail when I read the manuals on bleeding motorcycle brakes. On those bikes the clutch is not a cable with a screw at each end. It is a sealed hydraulic circuit that quietly ages on a calendar.
Barnett, which manufactures clutch kits and cables for motorcycles, puts the practical conclusion in its own printed instructions in six words:
Hydraulic controls are self-adjusting.
The rest of that paragraph is about making sure the system is bled and working, not about setting anything. Nothing on a hydraulic clutch takes a measurement at the lever, because the circuit takes up its own wear.
There is a detail in the Harley tables that proves the point from the other side. A footnote repeated across the hydraulic families reads:
Clutch fluid level will rise as clutch wears.
Brake fluid does the opposite — it falls as the pads wear down, which is why topping it up by habit erases a free wear indicator. The clutch reservoir moves the other way: as the friction material thins, the geometry on the far end of the circuit returns fluid towards the reservoir instead of taking it up. Harley states the behaviour without explaining the mechanism, so take the mechanism as my reading and the direction as the manufacturer’s. Either way, a level that has crept upward on its own is telling you something, and it is not something a cable clutch can tell you at all.
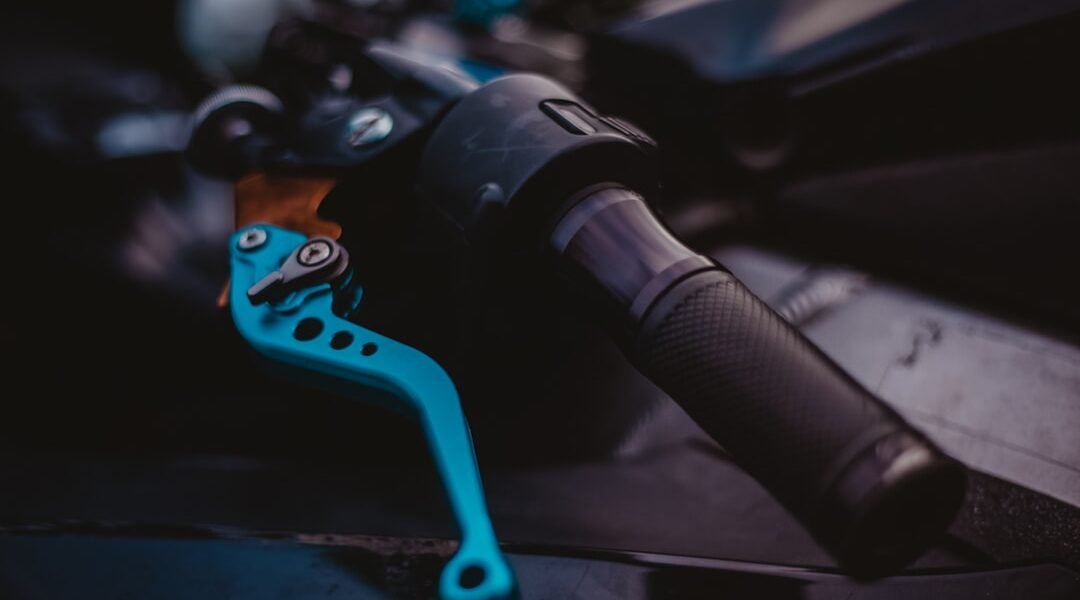
Ten seconds in the garage settles it. Look at the left lever perch. A small reservoir with a lid and a sight glass or a window means hydraulic: no adjustment, but a fluid with an expiry date. A cable disappearing down towards the engine, with a knurled adjuster and a locknut where it enters the perch, means you have a clutch you can set with your fingers.
The free play figure exists — and it moves depending on who is measuring
Ask the internet how much free play a clutch lever needs and you get a number stated with total confidence. Ask two primary sources and you get two answers that are not comparable.
The Yamaha MT-07 owner’s manual, printed in October 2014, states it plainly:
The clutch lever free play should measure 5.0–10.0 mm (0.20–0.39 in) as shown.
The XSR900 GP manual — the current 890 triple platform, a full ten model years later — prints the same specification in its own box: 5.0–10.0 mm (0.20–0.39 in). That is genuinely useful stability. When I read the same two manuals for chain maintenance, the slack figures did not match at all, and neither did the point they were measured from. On the clutch, one manufacturer has kept its number still for a decade.
Then look at Barnett’s sheet for cable-operated Harleys, at the end of its adjustment procedure:
With clutch cable properly installed, adjust freeplay in cable to 1/8″ between lever handle and bracket.
An eighth of an inch is about 3.2 millimetres. Set next to Yamaha’s 5 to 10 millimetres it looks like a contradiction, and it is not one — because it is not the same measurement. Yamaha measures the gap at the outer end of the lever, where the leverage multiplies every millimetre of cable slack. Barnett measures between the lever handle and its bracket, right at the pivot, where the same slack shows up several times smaller.
A free play number without its reference point is not a specification, it is a rumour. This is the single most useful thing to take away before touching anything: find the figure and the illustration in your own manual, because both halves matter.
And the licensing manual, which teaches millions of riders their pre-ride routine, gives no number at all. The Motorcycle Safety Foundation’s Motorcycle Operator Manual says this under “Check Your Motorcycle”:
Make sure the clutch and throttle operate smoothly. The throttle should snap back to fully closed when released. The clutch should feel tight and should operate smoothly.
Its T-CLOCS pre-ride checklist is no more specific. Under C for Controls, the levers line reads “Broken, bent, cracked, mounts tight, ball ends on handlebar levers, proper adjustment“. Proper according to what, the booklet does not say — because it cannot. It is written for every motorcycle at once.
The clutch is a pre-ride item, and the service plan barely touches it
Here is where the job actually lives in the factory hierarchy, and it is not where most riders assume.
Open either Yamaha manual at the pre-operation check list — the page you are supposed to run through in the garage next to brakes, tyres and lights. The clutch appears there with four instructions of its own:
Check operation. · Lubricate cable if necessary. · Check lever free play. · Adjust if necessary.
That line is identical in both manuals, ten years apart. And the clutch is named twice more on the same page: once under “Control cables” (“Make sure that operation is smooth. Lubricate if necessary.”) and once under “Brake and clutch levers” (“Make sure that operation is smooth. Lubricate lever pivoting points if necessary.”). Three separate entries on a single checklist, for one hand control.
Now look at the scheduled plan, where you would expect the real instruction to be. In Yamaha’s general maintenance and lubrication chart the clutch is item 3, and the job is “Check operation. Adjust.” It is ticked at 1,000 km and then at 10,000, 20,000, 30,000 and 40,000 km.
What it does not have is a tick in the annual check column. Brakes have one. Tyres have one. The cooling system, the lights, the sidestand, the brake switches — all have one. The clutch does not.
The consequence is easy to miss and worth stating out loud: if you ride a few thousand kilometres a year, the scheduled plan will never reach your clutch. A bike that covers 3,000 km a season arrives at its first 10,000 km tick somewhere in its fourth year. The only clock that touches the clutch in the meantime is the pre-ride list — the same one that already catches tyre pressure and brake feel, and the same reason the service schedule is a floor and not a ceiling.
The clutch is yours. The throttle is the dealer’s.
This is the finding that surprised me most, and it sits on a single page of the Yamaha chart.
Under the maintenance table there is a note that defines the whole document:
Items marked with an asterisk should be performed by a Yamaha dealer as they require special tools, data and technical skills.
Item 3, Clutch — check operation, adjust — carries no asterisk. Yamaha considers it an owner job.
Item 29, Throttle grip, in the same table, on the same page, does carry the asterisk. Its job description is “Check operation. Check throttle grip free play, and adjust if necessary. Lubricate cable and grip housing.” And the section it points to leaves nothing to interpretation:
The throttle grip free play should measure 3.0–5.0 mm (0.12–0.20 in) at the inner edge of the throttle grip. Periodically check the throttle grip free play and, if necessary, have a Yamaha dealer adjust it.
Two cables, a hand apart on the same handlebar. One has a number you are expected to set yourself. The other has a number you are expected to check and then hand to somebody with the right tools. I have never seen that asymmetry mentioned in a single article about clutch or throttle cables, and it reframes the job: adjusting your clutch is not you overstepping into dealer territory. It is one of the few adjustments the factory explicitly hands over.
Ten years on, one of those two cables has disappeared
Compare the two Yamaha manuals on the throttle and the difference is structural, not editorial.
The 2014 MT-07 says this:
The operation of the throttle grip should be checked before each ride. In addition, the cable should be lubricated by a Yamaha dealer at the intervals specified in the periodic maintenance chart.
The XSR900 GP says this:
The operation of the throttle grip should be checked before each ride. In addition, the throttle grip housing should be lubricated by a Yamaha dealer at the intervals specified in the periodic maintenance chart.
Cable became housing. The newer bike has an electronic throttle — its fuse box even lists an “Electronic throttle valve fuse” — so there is no throttle cable to lubricate, stretch or adjust. The pre-ride line changed to match: the MT-07 asks you to check throttle grip free play, the XSR900 GP asks only for “smooth rotation and automatic return”.
The clutch line, on both bikes, did not change by a single word.
Ride-by-wire killed one cable on the handlebar and left the other one standing. On a huge number of current motorcycles, the clutch cable is now the last mechanical cable your right or left hand pulls — the last place where a millimetre of stretch becomes something you can feel. That is a decent argument for learning to set it properly, rather than assuming the technology moved on.
Two adjusters, and the order matters more than the direction
Every cable clutch has a fine adjuster at the lever and a coarse one further down. Where riders get into trouble is by treating them as interchangeable.
Yamaha’s instruction for the lever end is simple enough:
To increase the clutch lever free play, turn the clutch lever free play adjusting bolt at the clutch lever in direction (a). To decrease the clutch lever free play, turn the adjusting bolt in direction (b).
Then comes the part people skip, printed as a tip immediately after:
If the specified clutch lever free play cannot be obtained as described above, proceed as follows: 1. Fully turn the adjusting bolt at the clutch lever in direction (a) to loosen the clutch cable. 2. Loosen the locknut at the crankcase. 3. To increase the clutch lever free play, turn the clutch lever free play adjusting nut in direction (a)…
Read that sequence carefully. The first move at the second adjuster is to wind the lever adjuster all the way back out first. You do not split the correction between the two — you park one at a known end of travel, set the other, then come back. The XSR900 GP procedure adds a locknut at the lever end too, and closes by tightening the crankcase locknut first and the lever locknut second. Locknuts are not decoration: a lever adjuster that walks loose in traffic changes your free play while you ride.
On a cable-operated Harley the whole sequence runs in the opposite direction. Barnett’s procedure starts nowhere near the handlebar:
1. Close mid-adjuster on clutch cable completely or disconnect cable from lever handle. 2. Loosen clutch adjuster lock nut on pressure plate. 3. Turn pushrod adjuster screw in firmly to assure ball/ramp is in complete off position. 4. Back screw out a few turns, screw back in until screw touches push rod. 5. Back screw out 1/2 turn and tighten lock-nut.
Only then does the lever get its 1/8″. The primary reference on that bike is a pushrod inside the primary case; the cable is what is left over. If you have been chasing a clutch that never quite feels right by turning the barrel at the lever, this is probably why: on that architecture the lever adjuster cannot fix a pushrod that is set wrong.
Reach adjustment is not free play adjustment
Modern levers often have a numbered dial or a knurled wheel that changes how far the lever sits from the grip. The XSR900 GP describes it plainly:
To adjust the distance between the clutch lever and the handlebar, gently push the lever away from the handlebar and rotate the clutch lever position adjusting knob.
That is reach, a comfort and ergonomics setting for the size of your hand. It is a different control from the free play adjuster, and moving one does not correct the other. Setting the lever closer to the bar because it “feels too far” while the actual free play is wrong just relocates the problem.
The related trap is the aftermarket easy-pull device, and Barnett flags it in its own instructions:
Use of any “Easy-Pull” device to decrease lever pull will reduce the movement of the pressure plate and can result in clutch drag, hard neutral, rough shifting.
Lighter lever effort is not free. Anything that reduces the force at your fingers by changing the leverage also reduces how far the pressure plate lifts — and a pressure plate that does not lift far enough is exactly the “cannot find neutral at the lights, first gear clunks” complaint people go looking for a cable adjustment to fix.
The cable itself: checked before every ride, lubricated inside
Both Yamaha manuals carry the same paragraph on control cables, and its warning is more specific than the usual advice to spray something into the end:
The operation of all control cables and the condition of the cables should be checked before each ride, and the cables and cable ends should be lubricated if necessary. If a cable is damaged or does not move smoothly, have a Yamaha dealer check or replace it. WARNING! Damage to the outer housing of cables may result in internal rusting and cause interference with cable movement. Replace damaged cables as soon as possible to prevent unsafe conditions.
The failure mode is described in the right order: the outer housing takes the damage, water gets in, the inner cable rusts inside a sleeve you cannot see, and only then does the lever start feeling notchy. By the time the symptom reaches your hand, the damage has already happened somewhere along a cable you have never looked at.
The T-CLOCS checklist asks for the same thing in four words that are easy to misread: cables need lubrication “ends and interior“. Not just the visible nipple at the lever — the length of it.
In the scheduled plan this is item 28, “Moving parts and cables — Lubricate”, every 10,000 km, and like the clutch itself it carries no asterisk. Yamaha recommends its own cable lubricant “or other suitable cable lubricant” and leaves it at that.
Two practical consequences. First, this is the one clutch job that pairs naturally with washing the bike, because washing is exactly when water gets pushed into places it does not belong. Second, it is the first thing to check on a bike that has spent months parked — a stiff clutch cable is one of the classic finds on the first ride after storage.
When the clutch slips, look at the oil before you touch the cable
This is the part that changed how I think about the whole subject.
Both Yamaha manuals print the same notice, and it is not in the clutch chapter at all. It is in the engine oil section:
In order to prevent clutch slippage (since the engine oil also lubricates the clutch), do not mix any chemical additives. Do not use oils with a diesel specification of “CD” or oils of a higher quality than specified. In addition, do not use oils labeled “ENERGY CONSERVING II” or higher.
Read the middle sentence again: do not use oils of a higher quality than specified. That is a factory manual telling you that “better” oil can be worse for your motorcycle. It only makes sense once you know that on a wet clutch the same oil lubricates the engine, the gearbox and the friction plates. What the car industry calls progress — lower friction, energy conserving, fuel economy — is, to a clutch, a lubricant doing its job on the one surface that is supposed to grip.
Suzuki publishes a technical sheet on the standard that exists precisely because of this problem, JASO T 903, established in 1998. Its explanation of why motorcycles needed their own oil standard is the clearest sentence I found on the subject:
When low viscosity and low friction oil is used in a motorcycle or ATV, clutch slippage and transmission tooth face damage can be a concern since the same oil lubricates the engine, clutch and transmission.
And on the two classes:
MB classification oil has low-friction characteristics. If MB oil is used in an engine for which MA oil is specified, there is a possibility that clutch slippage may occur.
What makes this more than marketing is that the classes are defined by numbers from a friction test, and Suzuki prints them. Three indices are measured — dynamic friction, static friction, and stop time — and each class occupies a band:
| Friction index | MA2 | MA1 | MB |
|---|---|---|---|
| DFI — dynamic friction | 1.85 – 2.50 | 1.30 – 1.85 | 0.50 – 1.30 |
| SFI — static friction | 1.70 – 2.50 | 1.25 – 1.70 | 0.50 – 1.25 |
| STI — stop time | 1.85 – 2.50 | 1.45 – 1.85 | 0.50 – 1.45 |
An MB oil can legitimately sit at a dynamic friction index of 0.50 while an MA2 sits at 2.50. That is not a nuance of formulation. That is a factor of five on the property your clutch plates rely on to hold torque.
Two details on that label are worth knowing before you trust it blindly, and both come from the same Suzuki sheet.
The testing is self-certification. In its own words: “It is the responsibility of oil product suppliers to conduct self tests in accordance with the JASO standard and to submit test reports to JASO.” The producer runs the test and files the report. There is a registration system behind it, but nobody independently retests every bottle on the shelf.
The sub-class on the label is optional. The 2006 revision split MA into MA1 and MA2, but suppliers “can choose whether to indicate MA or the sub-classification MA1 or MA2”. So a bottle that says only JASO MA may be an MA1 sitting at the bottom of the band, and you cannot tell from the front of the container. If your manual asks for MA2, the absence of MA2 on the label is not proof of anything — but it is not reassurance either.
Barnett, from the clutch side rather than the oil side, lands in the same place: its instruction sheet limits the choice to motorcycle-specific oils meeting JASO-MA, JASO-MA1 or JASO-MA2, with “(no friction modifiers)” in its own parenthesis, and rules out the alternative in two sentences.
Never use automotive oils. They do not meet specific and special requirements of motorcycle engines, clutches and transmissions.
None of this means an adjustment can never cause slip — a cable with zero free play holds the pressure plate slightly lifted the whole time you ride, and that will cook a clutch. But it does mean the diagnosis has at least three branches: the cable, the oil, and plates that have simply reached the end. Cheerfully adjusting the cable when the problem is a litre of energy-conserving car oil will not fix anything, and it removes the free play that was protecting the clutch.
Not every wet clutch swims in engine oil
There is one more architectural fork that changes the advice, and it is easy to miss if you have only ever owned Japanese bikes.
On a Harley the clutch does not live in the engine oil at all. It lives in the primary case, and the 2018 schedules bill its lubricant as a separate item: “Replace primary chaincase lubricant” appears in seven of the nine tables, on its own interval, alongside a separate “Replace transmission lubricant” line in eight of them. Engine oil, primary chaincase lubricant, transmission lubricant — three fluids on one motorcycle, and the one bathing the clutch plates is not the one you check with the dipstick.
The Sportster is the interesting exception, and it happens to be one of the two cable-clutch families. Its table has no primary chaincase line at all: it carries “Check primary chain adjustment” — the only table in the document that does — and “Replace transmission lubricant”. Which fluid your clutch actually swims in is a per-model question even inside a single manufacturer’s catalogue, and it is worth answering before you buy a bottle of anything.
Barnett’s sheet includes a note that is worth repeating carefully, because it is a report and not a verdict: the company says it has received numerous reports of Formula Plus oil causing clutch plate “sticking” on cold starts, especially in cold-weather regions. That is a clutch manufacturer flagging a symptom with the vehicle manufacturer’s own primary lubricant. Take it as a thing to be aware of if your clutch grabs on the first pull of a winter morning, not as a general condemnation.
The same sheet notes a third case: some motorcycles are designed with a separate oil supply to the clutch assembly, and on those — only those — automatic transmission fluid is a valid choice, with Type F giving harsher engagement and Dexron a smoother, more linear one. It is not a substitution to make on a bike that shares its oil between engine, gearbox and clutch. It is a reminder that “wet clutch” describes at least three different plumbing arrangements, and that the right answer for yours is in your manual rather than in a generalisation.
Why free play matters more than feel
It would be easy to file clutch adjustment under comfort. The licensing manual files it somewhere else entirely.
The MSF Motorcycle Operator Manual reaches for the clutch lever in three separate emergency procedures. For a throttle that jams open:
If the throttle stays stuck, immediately operate the engine cut-off switch and squeeze the clutch lever at the same time. This will remove power from the rear wheel, though engine sound may not immediately decline.
For a tyre going down:
When the motorcycle slows, edge to the side of the road, squeeze the clutch and stop.
And on ice or snow, where braking is the wrong instinct:
Be sure to keep off the brakes. If possible, squeeze the clutch lever and coast.
Three emergencies, one lever. In each case the assumption is the same: you pull it, and power to the rear wheel goes away completely and immediately. A clutch with too little free play may not fully engage; a clutch with far too much may not fully disengage when the lever hits the grip. That is the real reason the number matters, and it belongs next to the rest of defensive riding rather than in the comfort section.
It is also the second-best argument for keeping the cable lubricated. A lever that binds when it is cold and wet is a lever you cannot rely on at the one moment you need it fast — including in the rain, where a slow release is more likely to unsettle the bike.
“Always use the clutch” — unless your bike says otherwise
One last contradiction between the two Yamaha manuals, because it shows how quickly the ground moves under this subject.
The 2014 MT-07 is categorical:
Always use the clutch while changing gears to avoid damaging the engine, transmission, and drive train, which are not designed to withstand the shock of forced shifting.
The XSR900 GP prints the same warning with three words bolted onto the front:
Except when using the quick shifter, always pull the clutch lever when changing gears to avoid damaging the engine, transmission, and drivetrain.
Same manufacturer, same sentence, one new exception — because the newer bike ships with a quickshifter that manages the ignition cut for you. Clutchless shifting is not a skill you either have or lack, then. It is a feature your motorcycle either has or does not, and the manual is the only place that answer lives. One step further along the same road there are motorcycles with no clutch lever at all, and what that changes — mechanically, and on your licence — is the subject of automatic motorcycles. Everything else about smooth gear changes — the friction zone, the timing, the clutch as a low-speed balance tool — is riding technique, and I went through that side of it in the piece on how to ride a motorcycle.
Plates: where the primary sources stop
If free play is correct, the oil is right and the clutch still slips, the plates are next. Here is what a clutch manufacturer’s own instructions say, and where they deliberately stop.
On preparing new friction plates, Barnett’s wet clutch tip is refreshingly short:
Soak friction plates 1-3 minutes, wipe dry with a lint-free cloth and install per service manual.
One to three minutes, then wiped dry. Not the overnight bath that garage folklore insists on. On assembly order:
New Plate installation: Start with a Friction Plate, alternate steels and frictions. Last Plate in is a Friction Plate.
And on fit, the check that catches most of the trouble: every component must sit in the clutch basket “smoothly and with no binding”, with the basket, hub and pressure plate inspected for wear, grooving and stress cracks. A notched basket will hold plates that should be free to move, which produces drag that no amount of cable adjustment will remove.
Then the honest limit. Barnett’s own instructions say to install “per service manual” and to follow the factory service manual for removing and refitting the pressure plate and springs. The owner’s manuals I read do not cover any of it — Yamaha’s clutch section is exactly one page about free play. Beyond the lever and the cable, the primary sources hand you over to a service manual and a torque wrench, and this article is going to stop where they stop. There is a difference between the basic operations worth doing yourself and a clutch pack that comes out with the primary cover.
What I actually do, in order
- Identify the clutch. Reservoir at the lever perch means hydraulic: no adjustment, and a DOT 4 flush on a two-year calendar. A cable means the rest of this list.
- Find the specification and its illustration in the manual for that exact model. The figure and the point it is measured from travel together.
- Check it cold, on the sidestand, as part of the pre-ride routine rather than as an event. It takes about five seconds once you know what you are looking at.
- Adjust at the lever first. If the specification cannot be reached there, wind the lever adjuster fully back to slacken the cable, then work at the second adjuster, then return to the lever for the fine setting.
- Tighten the locknuts. Both of them, in the order the manual gives.
- Work the lever ten times and re-measure. Cables settle; a setting that was perfect before you moved anything often is not afterwards.
- Lubricate the cable ends and interior when the free play starts drifting between checks, and after any wash that soaked the bar area.
- If it slips, do not just tighten the cable. Confirm there is free play at all, then look at the oil — JASO MA, MA1 or MA2, no friction modifiers, no additives, nothing labelled energy conserving.
- If it drags or hides neutral, check that free play is not excessive, and be suspicious of any easy-pull device fitted to reduce lever effort.
Where a logbook helps, and where it does not
The reason I ended up reading four manufacturers’ documents in one afternoon is that I wrote RideLog, an app that keeps the record of what a motorcycle has actually had done to it. Rides are recorded automatically — it starts on movement, without you pressing anything — and maintenance reminders sit alongside them, so a job like a clutch cable lubrication or a two-year hydraulic flush stops depending on memory. If you own more than one bike, each one keeps its own history, which matters here more than it looks: a commuter that lives in the rain wants its cables looked at on a completely different rhythm from a bike that only comes out on dry Sundays.
Two honest limits, because the whole point of this article is that generic numbers are the problem.
- RideLog does not know your bike’s clutch specification. There are no factory maintenance plans loaded into it, and after reading a 5–10 mm figure and a 1/8″ figure that are both correct for their own machine, I am not going to invent a universal one. The number, the measuring point and the procedure come from your manual.
- It cannot tell you whether your clutch is hydraulic. Ten seconds and a look at the lever perch will.
What it does do is remember: when the cable was last lubricated, when the fluid was last replaced, which bike it was, and how many kilometres ago. It works entirely offline, and nothing leaves the phone — there is no account and no server holding your rides. If you want to see how it sits against the other apps in this space, that comparison lives in the roundup of motorcycle apps, and it is free to try: download RideLog.
Frequently asked questions
How much free play should a motorcycle clutch lever have?
Only your own manual can answer that, because the figure and the point it is measured from travel together. Yamaha specifies 5.0–10.0 mm (0.20–0.39 in) at the lever on both the 2014 MT-07 and the current XSR900 GP. Barnett specifies 1/8 inch — about 3.2 mm — for cable-operated Harleys, but measured between the lever handle and its bracket, right at the pivot rather than at the tip. Those two figures are not in conflict; they are two different measurements. The Motorcycle Safety Foundation’s manual gives no number at all and asks only that the clutch “should feel tight and should operate smoothly”.
How do I adjust a hydraulic motorcycle clutch?
You do not. Barnett’s instructions state that hydraulic controls are self-adjusting, and the maintenance they need instead is fluid. Harley-Davidson’s 2018 schedules put six of nine model families on hydraulic clutches and require flushing the brake and clutch systems and replacing the DOT 4 fluid every two years, or sooner if moisture content reaches 3% or greater. If the lever feels wrong on a hydraulic clutch, the questions are about fluid condition, air in the system and leaks — not about a screw.
Why does my motorcycle clutch slip?
There are at least three branches. A cable adjusted with no free play holds the pressure plate slightly lifted at all times, which will wear a clutch out. The oil is the second suspect: both Yamaha manuals warn that because the engine oil also lubricates the clutch, additives and oils labelled “ENERGY CONSERVING II” or higher can cause slippage, and Suzuki’s JASO sheet warns that a low-friction MB oil in an engine specified for MA may make the clutch slip. Worn friction plates are the third. Tightening the cable when the cause is the oil removes the free play that was protecting what is left.
Can I use car oil in a motorcycle?
Not on a bike that shares one oil between engine, gearbox and clutch, which is most motorcycles with a manual clutch. Suzuki’s technical sheet explains that the JASO T 903 standard exists precisely because low-viscosity, low-friction automotive oils risk clutch slippage and gear tooth damage in that architecture. Barnett rules out automotive oils outright, on the grounds that they do not meet the requirements of motorcycle engines, clutches and transmissions.
What do JASO MA, MA1 and MA2 actually mean?
They are friction classes, defined by measured indices rather than by marketing. Suzuki publishes the bands: dynamic friction index 1.85–2.50 for MA2, 1.30–1.85 for MA1 and 0.50–1.30 for MB, with similar splits for static friction and stop time. Two things are worth knowing. The testing is self-certification — suppliers run the tests themselves and submit reports to JASO. And since the 2006 revision that created MA1 and MA2, suppliers may label a product simply “MA” without the sub-class, so a bottle marked MA could be an MA1 at the bottom of the band.
Should I adjust at the lever or at the engine end?
At the lever first, because that is the fine adjuster. Yamaha’s procedure only sends you to the second adjuster if the specification cannot be reached at the lever, and the first step there is to wind the lever adjuster fully back to slacken the cable — you set one end at a known position rather than splitting the correction between the two. Cable-operated Harleys run the opposite way: Barnett’s procedure begins at the pushrod adjuster inside the primary and finishes at the lever, so the barrel at the handlebar cannot correct a pushrod set wrong.
Do I need to lubricate the clutch cable, and how often?
Both Yamaha manuals put cable condition and lubrication on the pre-ride list — checked before each ride, lubricated if necessary — and in the scheduled plan “moving parts and cables” are lubricated every 10,000 km. The T-CLOCS checklist asks for lubrication of the “ends and interior”, not just the visible fitting. The warning in the manual explains why it matters: damage to a cable’s outer housing lets water in, the inner cable rusts inside the sleeve, and the notchy lever you eventually feel is the last symptom rather than the first.
Is an easy-pull clutch lever a good idea?
Barnett explicitly warns against them, on mechanical grounds rather than taste: any device that reduces lever pull also reduces how far the pressure plate moves, and the result can be clutch drag, a hard-to-find neutral and rough shifting. If a clutch is genuinely too heavy, the causes worth eliminating first are a dry or damaged cable, a badly routed cable with sharp bends, and a free play setting that is simply wrong.
My clutch fluid level has gone up on its own. Is that bad?
On a hydraulic clutch, a rising level is the normal indicator of a worn clutch, not a fault in the reservoir. Harley-Davidson states it in a footnote in its schedules: clutch fluid level will rise as the clutch wears. It is the mirror image of brake fluid, which falls as the pads wear down — which is also why topping either one up out of habit deletes a free wear indicator you would otherwise get for nothing.